The Reluctant Cook’s Guide to Meal Planning: Homemaking Series, Pt. 6

In this final post in the Homemaking for Real People Series, I am getting really, really real! I am going to admit that I don’t like meal planning. But I still find it absolutely indispensable to the general health and happiness of my family, not to mention the maintenance of our budget. I also have to admit that I actually am not a big fan of cooking. Eating, yes. Cooking, not so much. It’s not that I can’t cook. I am actually a pretty good cook! I just don’t love it. I know some people who go bake or whip up a new recipe for the pure enjoyment of it. I don’t. I cook because I like to eat, and, as a matter of fact, so does my family! Since we believe that whole, natural foods are the healthiest way to fuel our bodies, we also like to eat food made from real ingredients. And having food allergies and sensitivities makes it even more necessary that I do a decent amount of cooking on a daily basis.

In order to manage all this cooking, I have to have a meal plan. But how does a reluctant cook go about doing this?

Enter, the Reluctant Cook’s Guide to Meal Planning:

Step 1: Make a Master Meal List

Make a master meal list of 20-30 meals that are simple family favorites that you can rotate again and again. For a lot of people, this means just dinners because they have about the same things for breakfast and lunch, like toast or cereal, and sandwiches or salad. Our family, however, doesn’t eat cereal except as an occasional snack, and since we have a wheat allergy, bread for sandwiches is a real pain. I also like a lot of variety, so I do actually have lists of our favorites for breakfast and lunch, as well. Your master meal list is something you can always fall back on when you are lacking creativity or just need a default for meal planning. Obviously, it is good to try new recipes, too, but it sure is handy to know you have this list of meals everyone will enjoy when you just need to hit the easy button.

Step 2: Find Your Style

This part takes some trial and error, in my experience, but once you find your groove, you’ll be set! Some people like to have a monthly meal plan, others plan weekly. I’m a weekly gal, thought sometimes I do plan for up to two weeks at a time. You may prefer to have a paper plan that you post in your kitchen, or a digital meal plan system like Plan to Eat. I actually put my meal plan right in my Happy Planner along with all my other weekly to-do’s so I can see everything all in one spot. There are myriad meal planning calendar printable online, so I encourage you to try out a few different styles until you find your sweet spot.

Step 3: Look at Your Calendar

Before you start writing out your actual meal plan, you need to consider what you have going on in your week. Knowing how much time you are going to have for meal prep each day helps you choose what to make. For example, I know if I’m going to be gone most of the day, I either need to plan to have leftovers for dinner or make a slow cooker meal that will cook itself while we are out. Also, consider the season and weather when choosing meals. If it’s going to 90 degrees and humid, you probably aren’t going to want to plan a lot of baking or roasting if you can help it.

Step 4: Make Your Meal Plan

Once you’ve got all the preliminaries done, all there is left to do is plug in meals from your master list (or maybe a few new recipes from a Pinterest board)! I like to write down breakfast, lunch and dinner in that order. For breakfast and lunch, I don’t have as many choices to rotate, so that goes pretty quickly. We like to try more new things for dinner, so sometimes it take me a bit longer. As I go, I have my grocery list alongside me, so I can write down any ingredients that we need for the coming week as I go. I also try and write in any prep-work that may need done ahead of time in my planner. If we are going to have soaked baked oatmeal on Sunday morning, for instance, I write down that I need to get the oats soaking while I’m making dinner Saturday evening.

Step 5: Follow Your Plan

So, you’ve gone to all the work of making a meal plan. Now you need to put it in a place where you will see it and do your best to follow the plan! I know there are times when plans change and meals will get switched or left out all together. I am fine with this as it is MY plan, after all. I have the freedom to change it as needed. But I also know that if I don’t take care, produce purchased for a specific meal may spoil, or meat may not get thawed in time, etc. If I want to be wise with my time and money, it helps to stick to the plan. And, yes, I do build leftovers into my meal plan as much as possible! It is frugal and time-saving, and even my kids have no problems with eating leftovers (most of the time).

Step 6: Have a Good Attitude

Okay, maybe this should have been first…and it certainly isn’t reserved just for meal planning and cooking! Having a good attitude and thinking positive about your role as cook and meal planner for your family will go a long way toward making it a more enjoyable experience. I know that I am always proud when I put a healthy, hot meal on the table for my family. It is satisfying to know that this is one way I can serve and bless my husband and children, and it really is not all that much trouble after all. Even on a frugal budget, we can enjoy good meals when I plan well and execute that plan. And so can you! So, go ahead. Make a meal plan and go cook something wholesome and delicious!

That wraps up our Homemaking for Real People blog series! I’ve enjoyed sharing a little more in depth on how we run our home, and I would love to hear what you’ve thought of the series! Would you like me to write more on topics of homemaking, planning, or routines? Leave me a comment below. I’m all ears!

Previous Posts in the Homemaking for Real People Series:

Intro to Homemaking for Real People: Homemaking Series, Pt. 1

Why Just “Good Enough” Housekeeping? Homemaking Series, Pt. 2

A Good-Enough Housekeeping Routine: Homemaking Series, Pt. 3

20 Daily “Quick Wins:” Homemaking Series, Pt. 4

Keeping the Laundry Monster at Bay: Homemaking Series, Pt. 5

More Than Just Another Money Management Book: Review and Giveaway!

Scroll to the end of this post to enter the giveaway and win a copy of More Than Just Making It!

When I signed up for The Humbled Homemaker, Erin Odum’s book launch team, I figured that this would be a good book to give me some encouragement and pointers on money management during a financially stressful time. And it was! What I did not count on was that it would get me thinking about so much more than just making ends meet. But then, with a title like More Than Just Making It, I guess I should have!

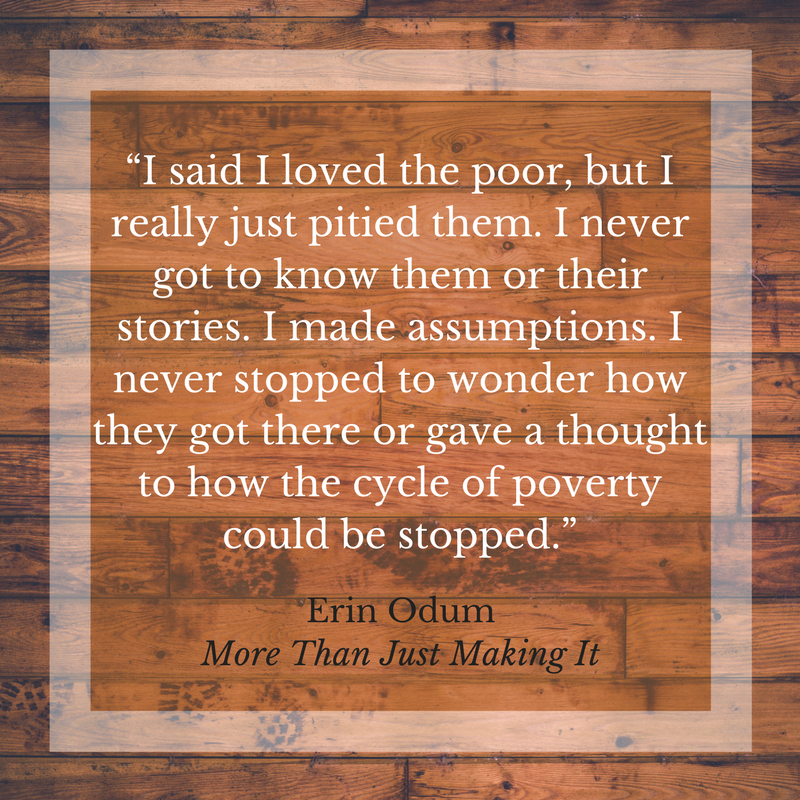
In her book, Erin shares very openly about her family’s struggles during several very financially challenging years, so difficult, in fact, that she finally came to the point of needing some government assistance just to put food on the table for her growing family. Having grown up in average middle class American culture, Erin discussed how humbling and eye-opening that experience was for her. In reading More Than Just Making It, I identified a lot with Erin’s preconceptions and prejudices about those who use government aid programs. Around the same time I received my advanced copy, my husband was just coming off a period of serious underemployment, and if it had not been for the savings we had built up over the past few years, we would have been part of the “working poor” just like Erin and her husband were.

Along with the memoire portion of the book, Erin also has a lot of practical financial advice on everything from saving money on healthy food, to making wise decisions when looking for a home. More importantly, though, she shares practical spiritual advice on how to find hope in the midst of your financial frustration. One of the greatest things she and her husband learned from their challenging situation was how to trust God for their everyday needs to be met, and then to be truly grateful to Him when He did provide.

One of my favorite chapters in More Than Just Making It is titled “Redifining the American Dream.” In this chapter, Erin discusses the need for a change in our mindset when it comes to how we in America think of financial success. I think this chapter resonated so much with me because of where our family is at right now. Yes, my husband now has a full-time income that is livable for us now, but we are moving to a very affluent area with a higher cost of living than we are used to. It would be very easy for us to look around at all the big, beautiful houses and become envious and strive to attain that for ourselves. But lately we have felt the desire instead to simplify and downsize. If there is one thing packing for a move teaches just about everyone, it is that we have too much stuff! My new hope for our family finances is that we will have enough to take care of our needs and then be flesible enough to give generously above and beyond our tithe. I want us to be content with what we have and to be hospitable and welcoming without self-consciousness.

All that to say, I highly recommend More Than Just Making It: Hope for the Heart of the Financially Frustrated to anyone, not just those of you who may be in need of money managment tips. This book will encourage, inspire and challenge you to be a wise steward of what you have, to look for God’s provision in unexpected places, and to seek to be a blessing to others who are hurting. I hope you will check out the book webpage for all the amazing pre-order goodies Erin is offering if you purchase the book before the release date of September 5, 2017! And, finally, I have a special chance for one lucky reader to win a print copy of the book! You can enter the giveaway below, or click here to be taken to a new page and enter. The giveaway will close on September 4, 2017 at midnight, so don’t delay! I will contact the winner by email for your mailing address. Enjoy!

a Rafflecopter giveaway

10 Tips for Consignment Sale Shopping Success

Last weekend I talked about why I love shopping consignment sales to help save money on my children’s clothing. But I admit that the first time I went to a sale, I was not sure what to expect and did not know quite how to make the most of my time and money while there. Now that I have a bit more experience, I thought I would share some tips and tricks I have learned to help you have consignment sale shopping success!

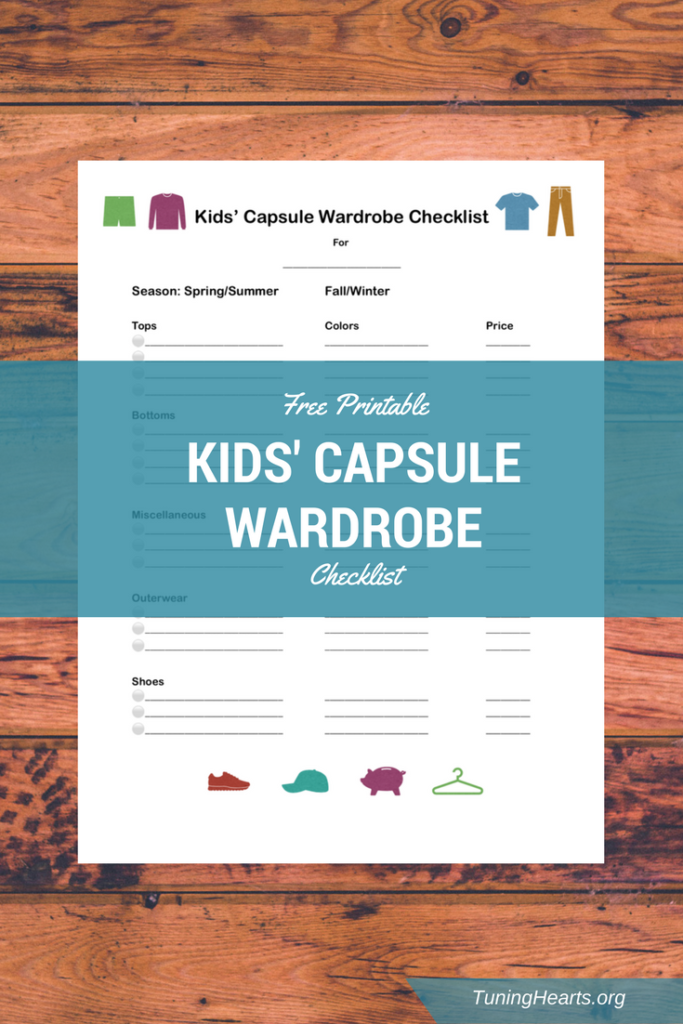
1. Have a specific shopping list complete with size information for each person for whom you are shopping. This is where having a copy of my Kids Capsule Wardrobe Checklist will come in really handy! Most consignment sales are pretty huge and can be very overwhelming if you do not have specific items in mind as you shop. Keeping track of what you need to look for helps you avoid getting distracted by all the other “shiny objects” in the room so you can stay within your budget.

2. Leave the kids at home. Seriously, you do not need or want to be trying to corral your children while sifting through racks of clothes or searching piles of toys. And you certainly don’t need them begging for unnecessary toys and books that are not on your to-buy list! Plus, many venues do not even allow children at the sale, especially pre-sale time slots. So, save yourself the trouble and enlist your husband, mother, a friend or even hire a babysitter to watch the kids. Trust me. You will thank me later!

3. Find out what time you can shop the discount sale, and take advantage of better bargains. Most consignment sales will have one or more time periods for discounted prices, often up to 50% off marked prices! And if you are a volunteer or a consignor, you can usually get in to shop these discounts before the general public.

4. Grab everything you think you might want to buy, then sort through your items and make decisions later. Since just about everything at a consignment sale is the only one of that item in that size, the good stuff will go fast! And in a large venue, you probably will only have time and energy to go over each section of the racks one time. So if you like the looks of something, put it in your cart, tote or whatever you have to carry your loot, then you can go back and sort through everything to decide what you will keep and what to put back.

5. Double, maybe even triple check items for stains, holes, and correct sizing. This is the sorting process I just talked about. Not only do you need to go through every item to make sure it is something you want to buy, but you need to double check for any flaws that might have been missed before the sale began. Most consignors are honest and don’t intend to try and pass off badly stained or torn clothing, but everybody makes mistakes and things get missed. Also, sometimes items get mislabeled by mistake. At my first sale, I bought a cute seersucker sunsuit for my little gal, only to find the actual size on the tag inside the outfit was much smaller than what the outer label had claimed. Again, I am sure it was just a mistake, but it was money wasted on my part. This is also the time to go over your shopping list and see what items you have filled and what you might still need to look for.

6. Volunteer or be a consigner to get in on pre-sales and early discounts. I alluded to this before,
ut it truly pays to do more than just shop! Consignment sales could not happen without the hours put in by volunteers who help sort items, run checkout and tear down after the sale. The people who run these sales reward volunteers with special passes to pre-sales and early discounts. If you are able to give a couple of hours, it will be worth your effort because you get a chance at the best items and bargains of the whole sale! Consignors also get in on early discounts and pre-sales! Plus, you get rid of unneeded items and earn a little money on the side! As I mentioned in my last post, I have been able to earn enough back from consigning to cover the cost of what I bought the last two sales! More tips on being a consignor to come…

7. Know what kind of payment is accepted before you go. Some sales may only accept cash or credit. Others take checks but not credit. Be sure to double check with the sale website or Facebook page to know what kind of payment you need to have with you. It would really stink to get all the way to checkout and come up short because you did not have the right thing to pay for your purchases!

8. Shop early if you are looking for big ticket items like furniture. Kids’ consignment sales usually have much, much more than just clothing and shoes. Toys, strollers, cloth diapers, baby carriers, nursery or playroom furniture….you can find it all at consignment sales! If you are looking for something specific that is a bigger ticket item or is in high demand, you will not want to wait until discount night to look for it. This is where being a volunteer or consignor will come in handy because you will want to shop the pre-sale to grab the good stuff before it’s gone!

9. Know what kind of venue you will be in and dress accordingly. I have been blessed to shop a sale in a nice, air-conditioned venue. But I have heard of some that have gone to sales and been either freezing or burning up because of poor climate controls. So if you think you might need it, bring a jacket in the fall and winter, or dress light in summer. And wear comfy shoes. You are going to be on your feet, likely on concrete, for a few hours. You don’t want to be in heels for this job!

10. Give yourself plenty of time to shop, sort and check out. The time you need will, of course, depend on how long your shopping list is, as well as how big the sale venue is and how many shoppers are there when you are. I have found at our local sale, shopping just for clothes for 2 kids, I needed over 2 hours, and 3 is probably more realistic. The first hour and half is spent going through the racks and grabbing items, then sorting and putting back anything I did not end up wanting. Depending on how many shoppers are trying to check out at the same time I am, it has taken at least 30 minutes just to go through checkout. That is the tedious part, but if you go in knowing to expect it (and maybe have a friend to help pass the time, see next tip), you can plan accordingly and just grin and bear it. The wait will be worth it in the end!

BONUS: Team up with a friend or family member. Divide and conquer! If you have a long shopping list or several people to shop for, this could be really helpful. I am betting Grandma would love to help shop for her grandkids, and maybe even find a few special items she wants to buy them for Christmas or birthdays! Or if you and a friend go shop together, even if you each only shop for your own kids, one of you can finish early and get in line for checkout, saving a space for the other while she finishes up her list. Tag-teaming the checkout lane during a really busy time slot can help save time and energy!

So, there you have it! My top tips and tricks for consignment sale shopping success! Would you add anything I missed? Leave a comment below and let me know!

How I Save Money on Kids’ Clothes: Consignment Sales

A few posts back I wrote about how I save money on my kids’ clothes by creating seasonal capsule wardrobes for them. Another of my tried and true methods for not breaking the bank when buying children’s clothing is to buy gently used clothing rather than brand new items. And my current favorite way to do this is by shopping consignment sales! If you have not tried shopping consignment sales, you are missing out, let me tell you!

A few years ago, I really did mot know what all the fuss was about our local kids consignment sale. I figured it was just a glorified garage sale, so I just skipped it. But then one year I decided to just give it a try, both selling and buying. I had such a great experience that I hate the fact that I am missing out on it this fall because of our move! (But you can count on me finding a sale to shop in our new area!) So, why do I love to shop consignment when it comes to kids’ clothes? Let me count the ways!

  1. One night of shopping, and boom! I have finished my clothes shopping for the season. Seriously, I go in there with my handy dandy Kids’ Capsule Wardrobe checklist, sift through the racks to find what I need, and at the end of the night, I have pretty much everything on my list! I have found that it is getting harder to find everything for my boy because he is getting to that age in which there is just less of a selection, at least at the sale I have been shopping. And sometimes I need to buy brand new shoes because the used ones can be pretty roughed up. (But I ALWAYS get shoes on clearance unless I cannot possibly avoid it. They are just overpriced otherwise, in my opinion.)
  2. I can often find cute name brand clothes that I could not normally afford for a fraction of the price. Gap, Gymboree, and even more select boutique style clothes are often easy to find at consignment sales, and they are usually in great shape. I especially like shopping for Christmas and Easter dresses for my little girl because they have usually been worn so few times that they are practically brand new! And at around $2-4 per dress on discount night, I can buy a couple and still not spend half what I would shopping a department store clearance rack!
  3. I shop the discount night to get an even better bargain! Most consignment sales have one or more time slots in which you can get as much as 50% off everything! Some sellers may choose not to give a discount or to offer a lower discount, so that is something to watch for as you check tags before buying. But I try to buy as much that is the lowest discounted price as possible. Often, if you are a volunteer helper at the sale or are a seller, you get an early bird pass to shop the discount sale first and snatch up the beat deals before the general public.
  4. I can also sell our gently used kids items and make back a part, if not all, of the money I spend shopping the sale! This was probably the thing that got me hooked on consignment sales the most. Every time I have sold items, I have been able to make enough to cover the cost of that season’s clothing. Often, I had one or two bigger ticket items along with all the clothes, like my son’s old train table and a barely used stroller. These help make a bigger contribution to the total profits! It is work to label everything and get it set up at the sale, but in my experience it was totally worth the effort. And it was much easier than having a full-on yard sale on my own!

I could go on and tell you a few pointers I have learned about buying and selling at consignment sales, but I think I will save that for another post. For now, I want to hear from you! Have you shopped consignment sales for kids clothing? Did you love it, or hate it? What is the best deal you have snagged shopping consignment?

Fall and Winter Capsule Wardrobes for Kids

In my last post I talked a little bit about why and how I chose to use a capsule wardrobe for my children’s clothes both to save money and space. Today I thought it might be helpful to share what items I include in my shopping list when I am preparing to go to the thrift store, consignment sales or other venues. These may not be comprehensive lists, but they are the actual lists I will be working from this fall for my 6 year old son and 2 year old daughter. (Tip: Scroll to the bottom of this post if you want to know how to get your own printable Kids’ Capsule Wardrobe Checklist!)

Boy’s Fall/Winter Capsule Wardrobe

Tops:

  • 6 t-shirts
  • 3 dress shirts
  • 2 fleece or hooded sweatshirts

Bottoms:

  • 3 pairs jeans
  • 3 pairs sweats or athletic pants
  • 2 pairs dress slacks (1 black, 1 khaki)

Miscellaneous:

  • 2-3 pairs long sleeved pajama tops and bottoms

Shoes:

  • Tennis shoes
  • Winter boots

Outerwear:

  • Winter coat

If I needed to buy my son new socks or underwear, those would also get added to the miscellaneous list. I would also note the sizes of each category of items needed. As you can see, I plan just enough of everything to get him through one week. Then we do laundry! Ha! Often times my children receive some extra clothes as a gift from family, offering more wiggle room between laundry days. But we get by just fine with this minimal amount of clothes.

My toddler girl’s shopping list will be a little bit bigger. This is mostly because she is not quite fully potty trained, so we sometimes need a few extra pairs of bottoms to get us through to laundry day, although she is getting much better! Also, she is going to be wearing mostly dresses and leggings or tights in the cold months, not so much for style (even though I do love the look!) but because she is so skinny! Especially without a fluffy diaper on her bum, I cannot find pants to fit her in length that will not just fall right off her slim waist.

Girl’s Fall/Winter Capsule Wardrobe

Tops:

  • 4 long sleeved shirts
  • 3 long sleeved dresses
  • 1-2 jumpers
  • 2 cardigans

Bottoms:

  • 4-5 pairs leggings (2 black, 2 denim, 1 brown/grey)
  • 4 pairs thick tights (black, cream, grey, pink)
  • 2-3 denim or khaki skirts

Miscellaneous:

  • 3 pairs long sleeved pajamas

Shoes:

  • Black dress shoes
  • Play shoes
  • Boots

Outerwear:

  • Fleece jacket
  • Winter coat

If you would like to get a printable PDF copy of my Kids’ Capsule Wardrobe Checklist to take shopping with you, just sign up for my email list below. After you confirm your subscription, you will receive a password to access my Members Only Resource Library!

So, there you have it! If you would be interested in seeing my basic spring/summer capsule wardrobe list, please leave a comment below. I would be happy to post that as well at a later date!